To install CeraMag Theme, first you need a working WordPress site. Click the link below to find out how to install WordPress: https://wordpress.org/support/article/how-to-install-wordpress/
We assume that you already have a running WordPress site. Now let’s install CeraMag.
You need to download the theme zip file from ThemeForest first. Go to Downloads on ThemeForest, and find CeraMag. Download the files and find ceramag.zip – that’s what you need for installation.
- On your website dashboard, go to Appearance > Themes > Add New > Upload Theme.
- Choose ceramag.zip you just downloaded.
- Install and activate it.
- You will see the notice “This theme requires/recommends the following plugins…”, please click on those links and follow instructions to install those plugins.
- Done.
Please note: If you are going to write custom code for the theme, then please also upload the ceramag-child.zip file (you will find it in the folder “WordPress Child Theme” in your download package), then install and activate the child theme. Then you can change code or write your own custom styles for the theme in the child theme files. Later when you need to update the theme, just update ceramag.zip (the parent theme), so your custom code changes will not be overwritten (because they are all in the child theme).
Install CeraMag Theme via FTP
You can install CeraMag theme via FTP if you encounter problems while installing it via WordPress.
- Download the files and find ceramag.zip, and unzip it to get a folder ceramag.
- Log into your site via FTP, and browse to your folder located at wp-content./themes.
- Upload the extracted folder ceramag to your server.
- Log into your WordPress site and navigate to Appearance > Themes to activate CeraMag.
- You will see the notice “This theme requires/recommends the following plugins…”, please click on those links and follow instructions to install those plugins.
- Done.
Install Required Plugin
As mentioned above, when installing & activating CeraMag theme, you will see the notice “This theme requires the following plugins: CeraMag Extension”. It is the Ceramag Theme function extensions – including these features: post like, post sharing, gallery slider, Instagram feed and more.
- After Installing CeraMag theme, activate it, then you will see a note box, it says: “This theme requires the following plugin: CeraMag Extension.” Click on “Begin installing plugin” to install it.

-
After clicking on “Begin installing plugin” link, it will go to “Install Required Plugins” page, then click on “Install” link below “CeraMag Extension”.
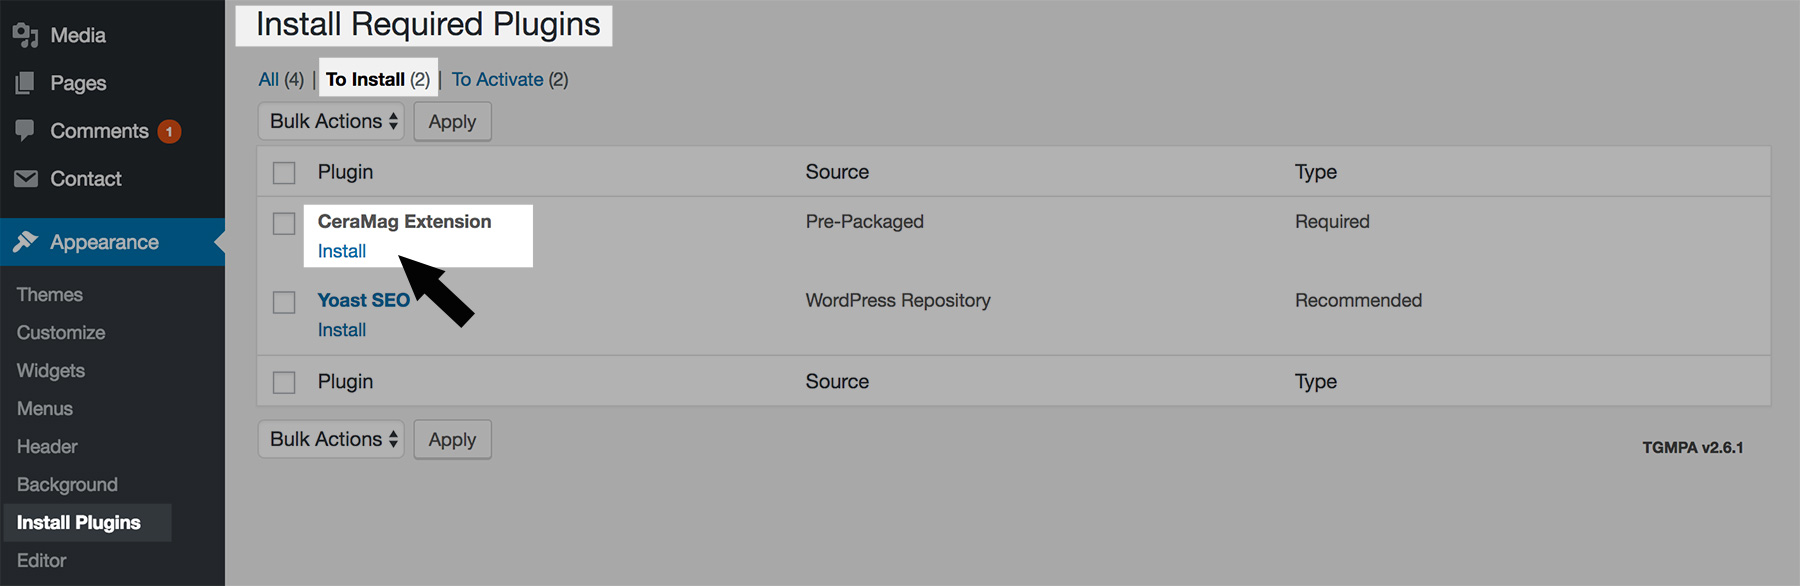
- Then don’t forget to activate “CeraMag Extension“.
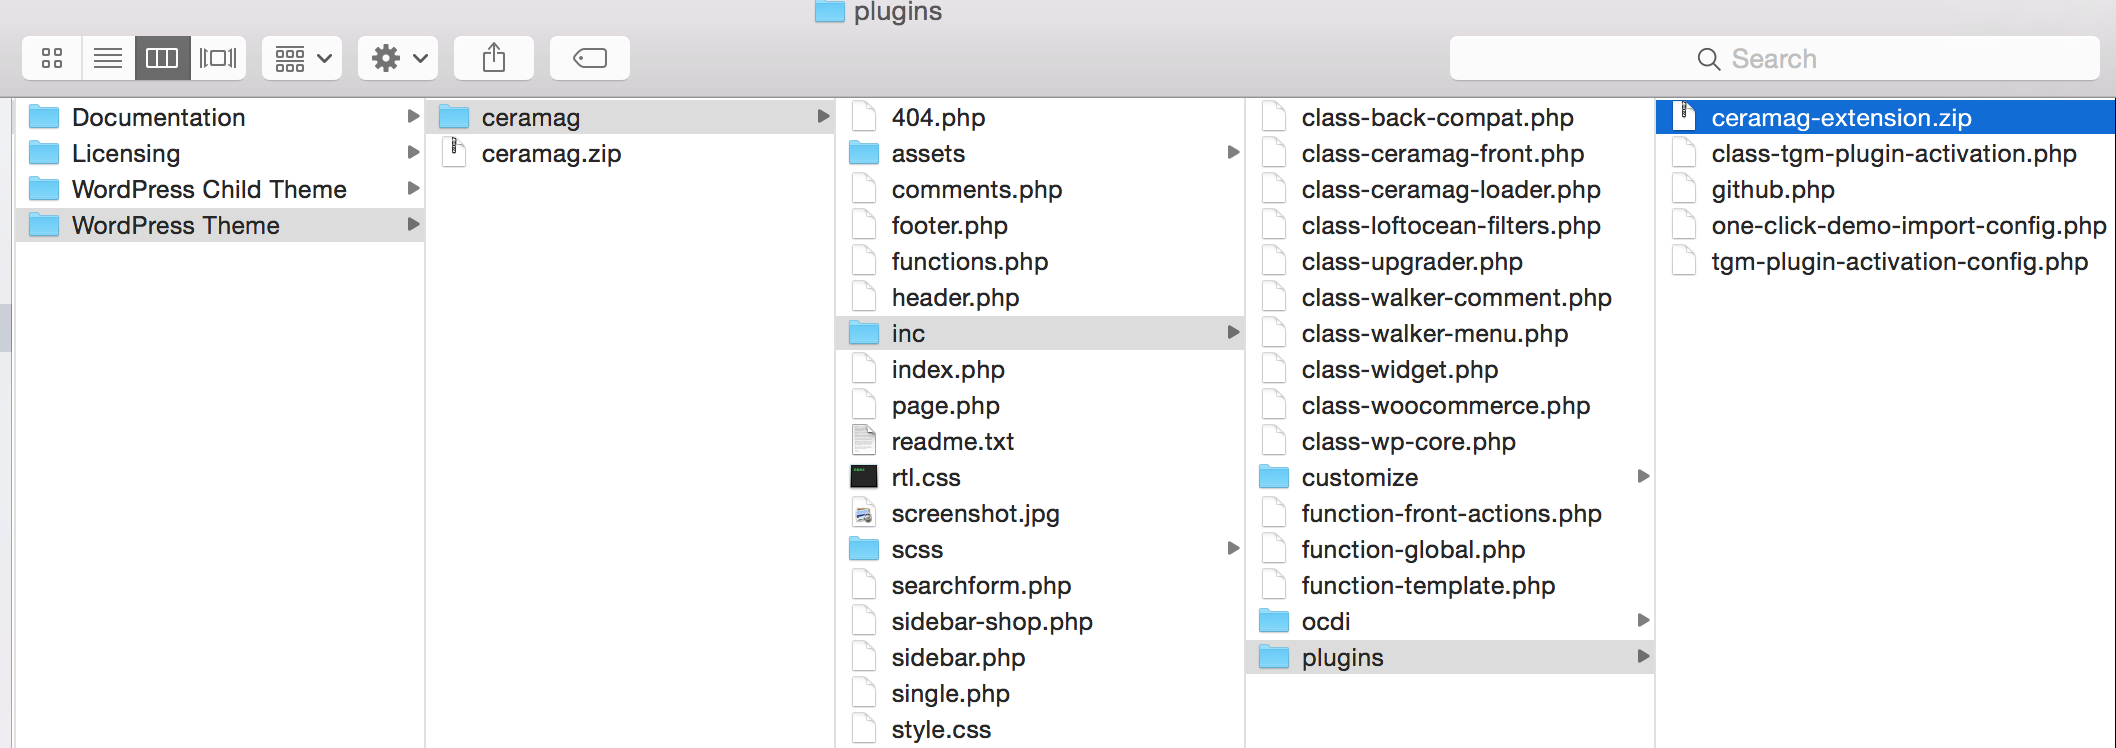
If you need to find “CeraMag Extension” zip file, please go to “ceramag” theme folder > inc > plugins > then there is “ceramag-extension.zip“.
Recommended Plugins
As mentioned above, when installing & activating CeraMag theme, you will see the notice “This theme recommends the following plugins…“. Those plugins are not required to use the theme, but will extend the theme basic functionality.
All those plugins are hosted on the official WordPress repository and are made by other authors. You don’t need to install and activate all of them, just choose those you will use on your site.
- After Installing CeraMag theme, activate it, then you will see a note box, it says: “This theme recommends the following plugin:…” Click on “Begin installing plugin” to install it.

- After clicking on “Begin installing plugin” link, it will go to “Install Required Plugins” page, tick the boxes of the plugins you will need on your site, then choose “Install” from “Bulk Actions” drop down list and click on “Apply” button. (You can install the required plugin and recommended plugins at one time.)
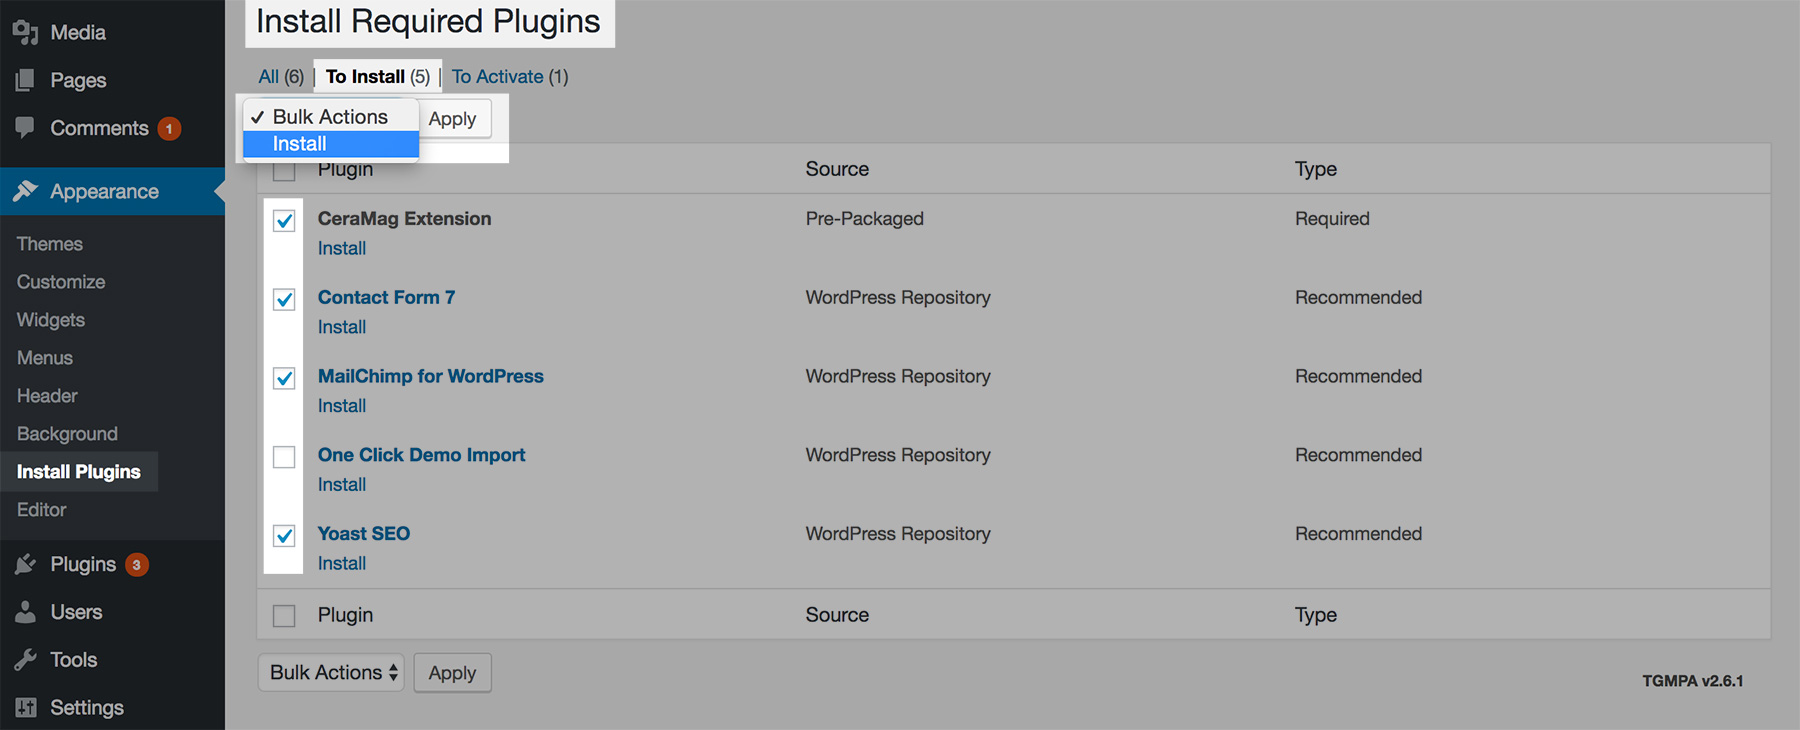
- Then don’t forget to activate the plugins.
The recommended plugins are:
- Contact Form 7 – To create a contact form and add it to your page.
- MailChimp for WordPress – To create a subsribe form and can add it to content area, widget areas and site footer.
- One Click Demo Import – To import CeraMag theme demo data for a quick start.
- Yoast SEO – To optimize your website SEO.
- WooCommerce – To build your own online shop.