As a WordPress theme for traveller blog and magazine, displaying a Google Map with destinations is an essential feature. In this how-to article, we will explain the steps of how to add a Google Map with Eaven theme.
- Get Google Map API Key
- Add Google Map API Key to your site
- Add locations to your posts
- Display a Google Map on homepage
- Add a Google Map to page/post content
- How to display a map with a specific location, not posts?
Get your Google Map API Key
Starting from June 11, 2018, Google requires new API key to use Google Map. To get the API key, you need a Google Cloud Platform billing account. When you create a billing account, you are automatically eligible for the Google Maps Platform recurring $200 monthly credit.
You can find the following information on the Google Map “Pricing and Billing Changes” page:
Can I still use Google Maps Platform for free?
Yes. When you enable billing, you get $200 free usage every month for Maps, Routes, or Places. Based on the millions of users using our APIs today, most of them can continue to use Google Maps Platform for free with this credit.
Please watch this video to know how to get your Google Map API Key:
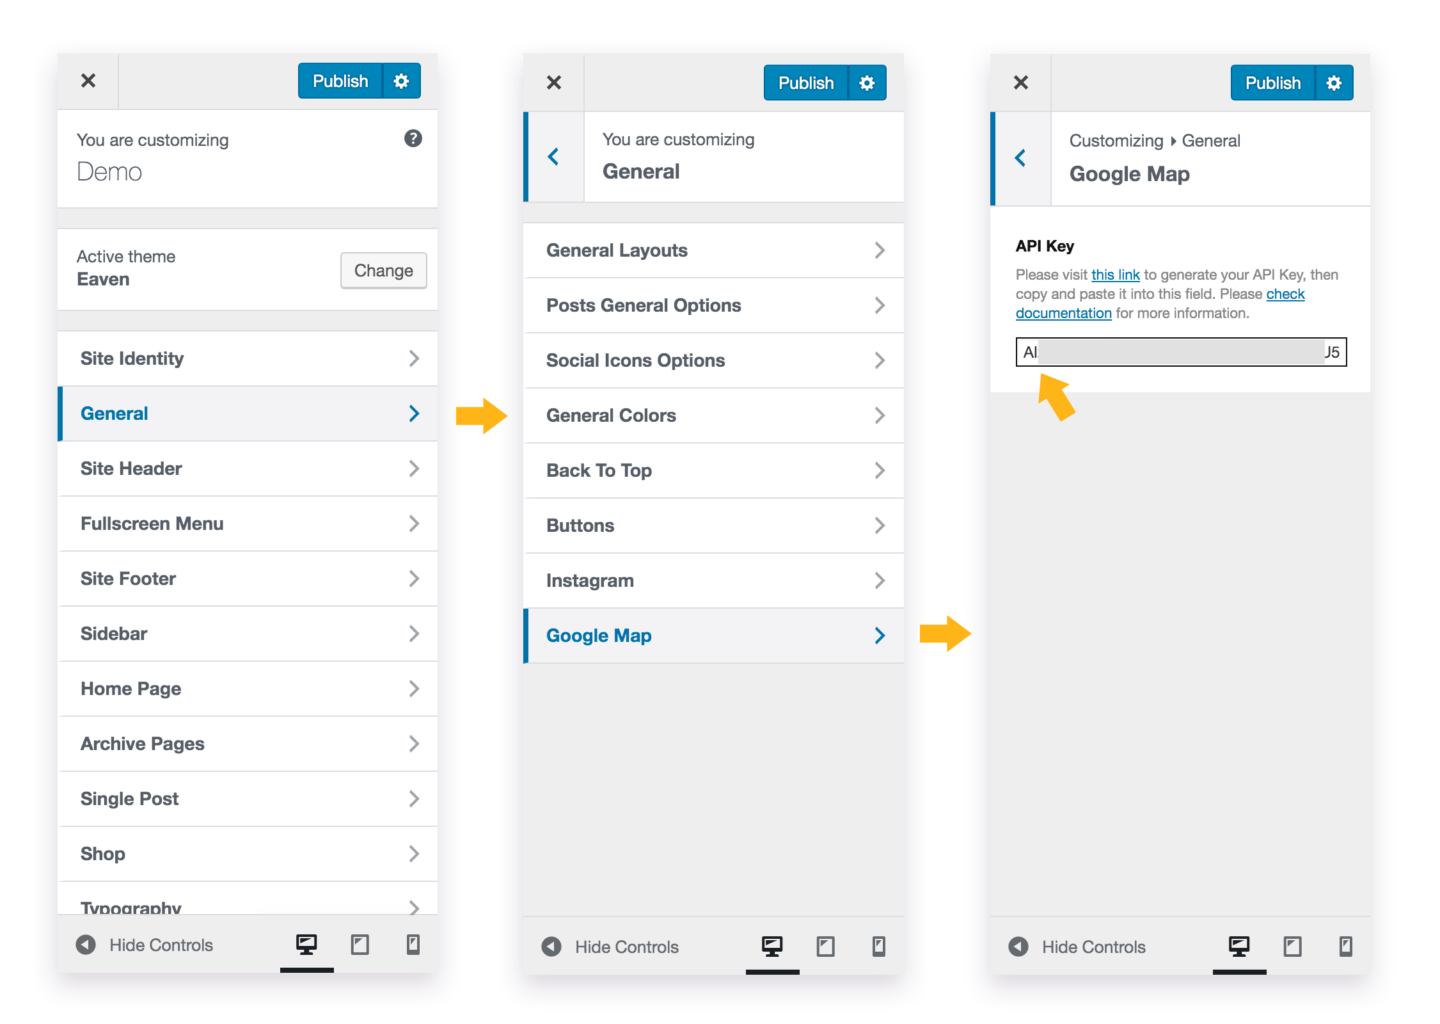
Add Google Map API Key to your site
When you get your Google Map API Key, please copy it, and open your website Customizer, then go to General > Google Map > Paste the key into “API Key” field. Then save the changes.
Now your map is ready to display. But, to display pins on the map, you need to add locations to your posts first. Please read the following section.
Add locations to your posts
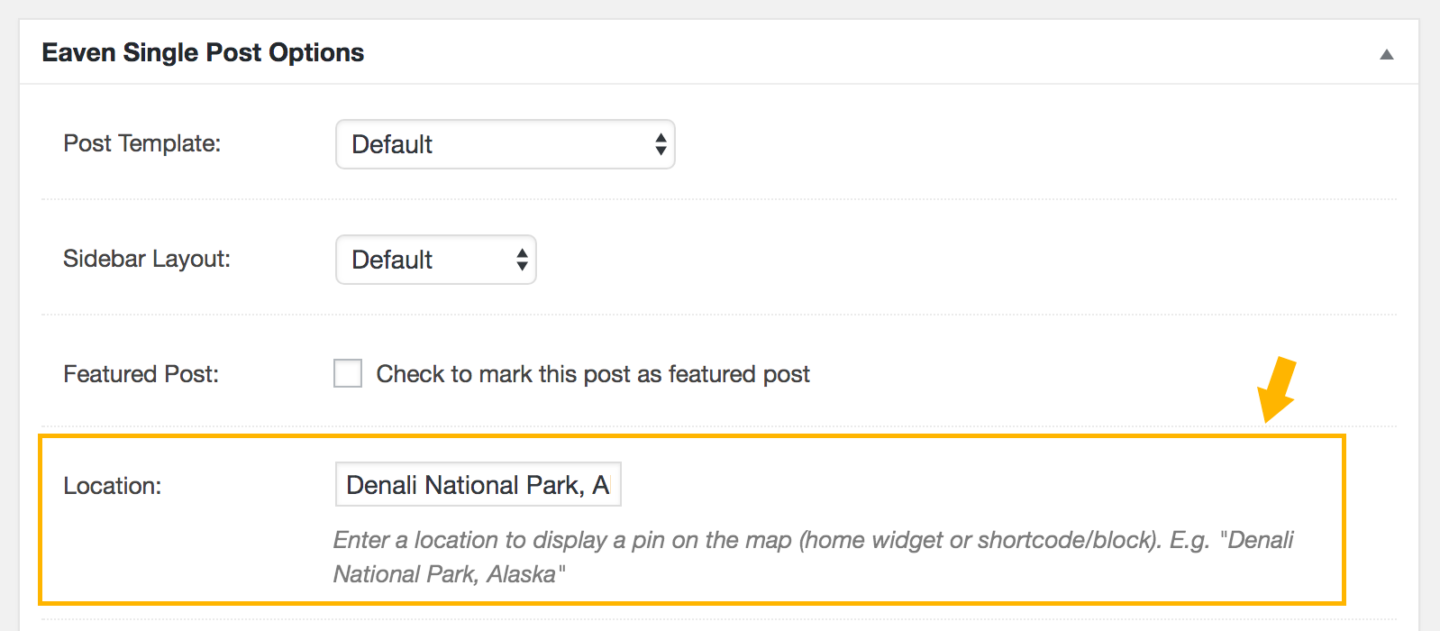
In Classic Editor
When you write a post, scroll down the edit page and then you will find the Eaven Single Post Options panel > Location field. If you are writing a post about a destination (country/states/city/etc.), you can add the name of this destination to the Location field, such as “Sydney, NSW, Australia“.
Please note: Do not add same location to different posts, otherwise, the post information cannot be displayed on the map when clicking on the pin.
Latitude & Longitude
After adding a location to a post, when saving the changes to this post, the Latitude & Longitude values will be generated automatically from the location added. The Latitude & Longitude values are required to display a pin on the map. You can add custom Latitude & Longitude values if the map pin location in incorrect.
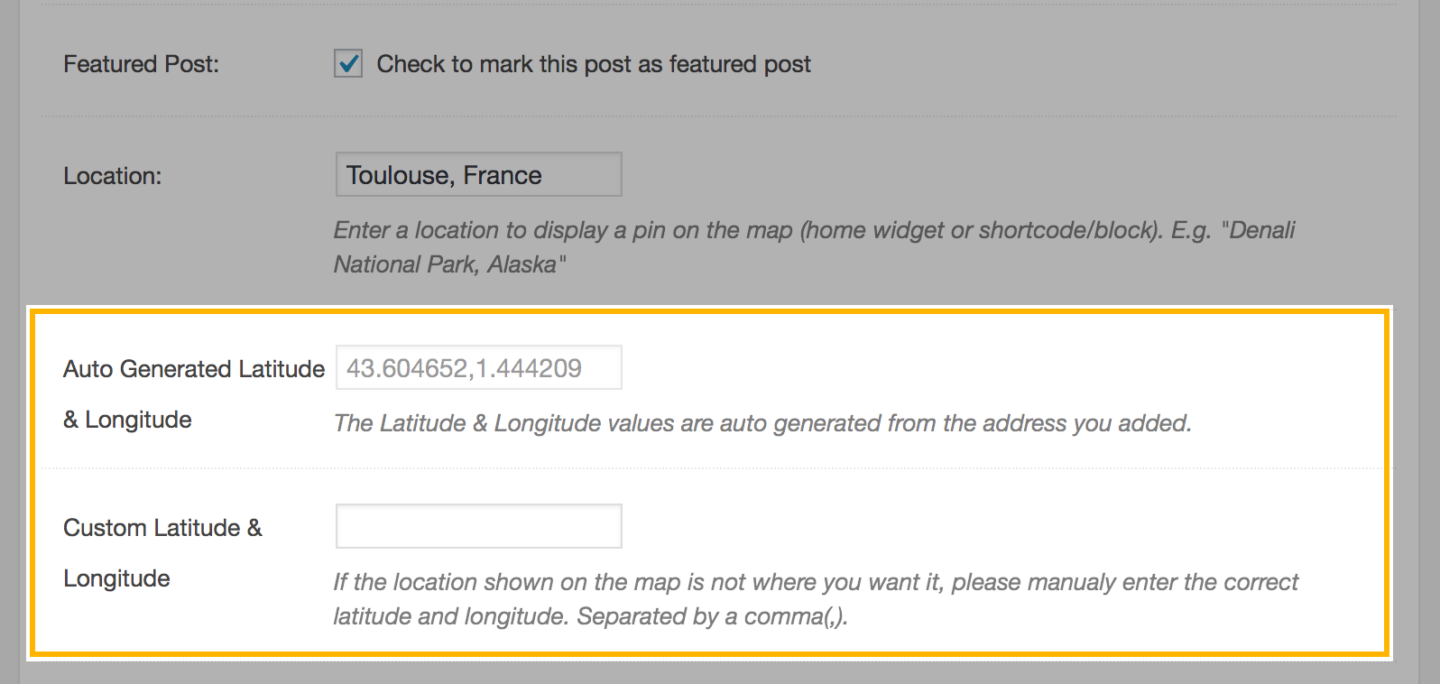
Please note: The Google Map API key is required to auto generate Latitude & Longitude values.
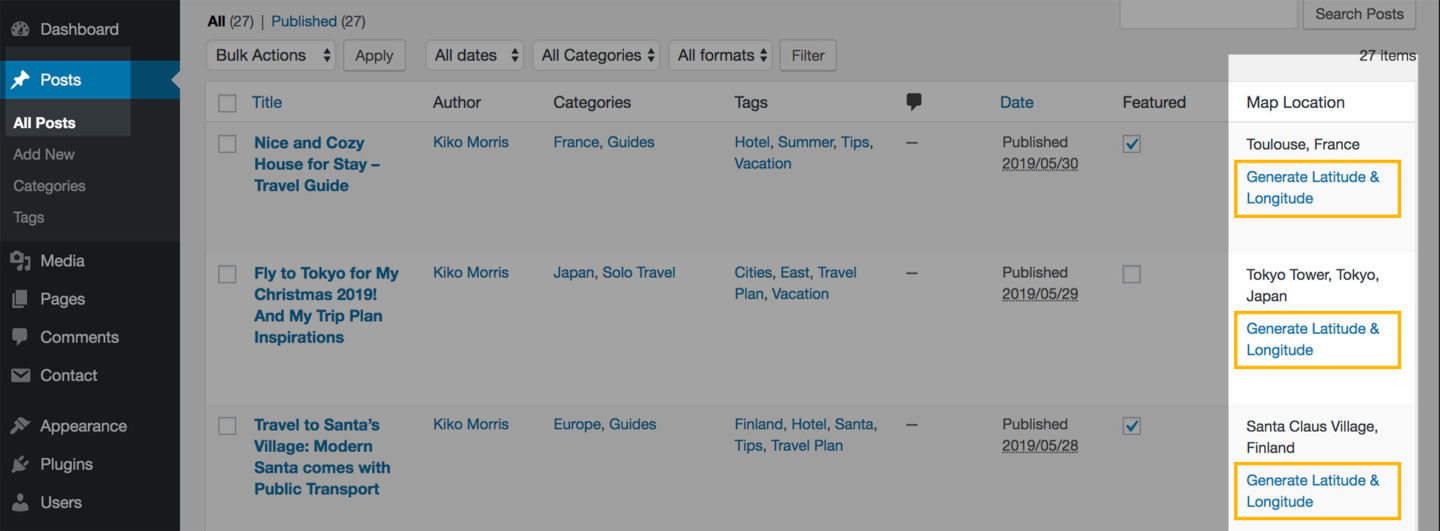
If you added some locations before adding your Google Map API key, please:
- Method 1 – Re-save the posts to auto generate the Latitude & Longitude values.
- Method 2 – Or, on the post list page (dashboard > Posts > All Posts), find the “Map Location” column, then click on the “Generate Latitude & Longitude” button for each post.
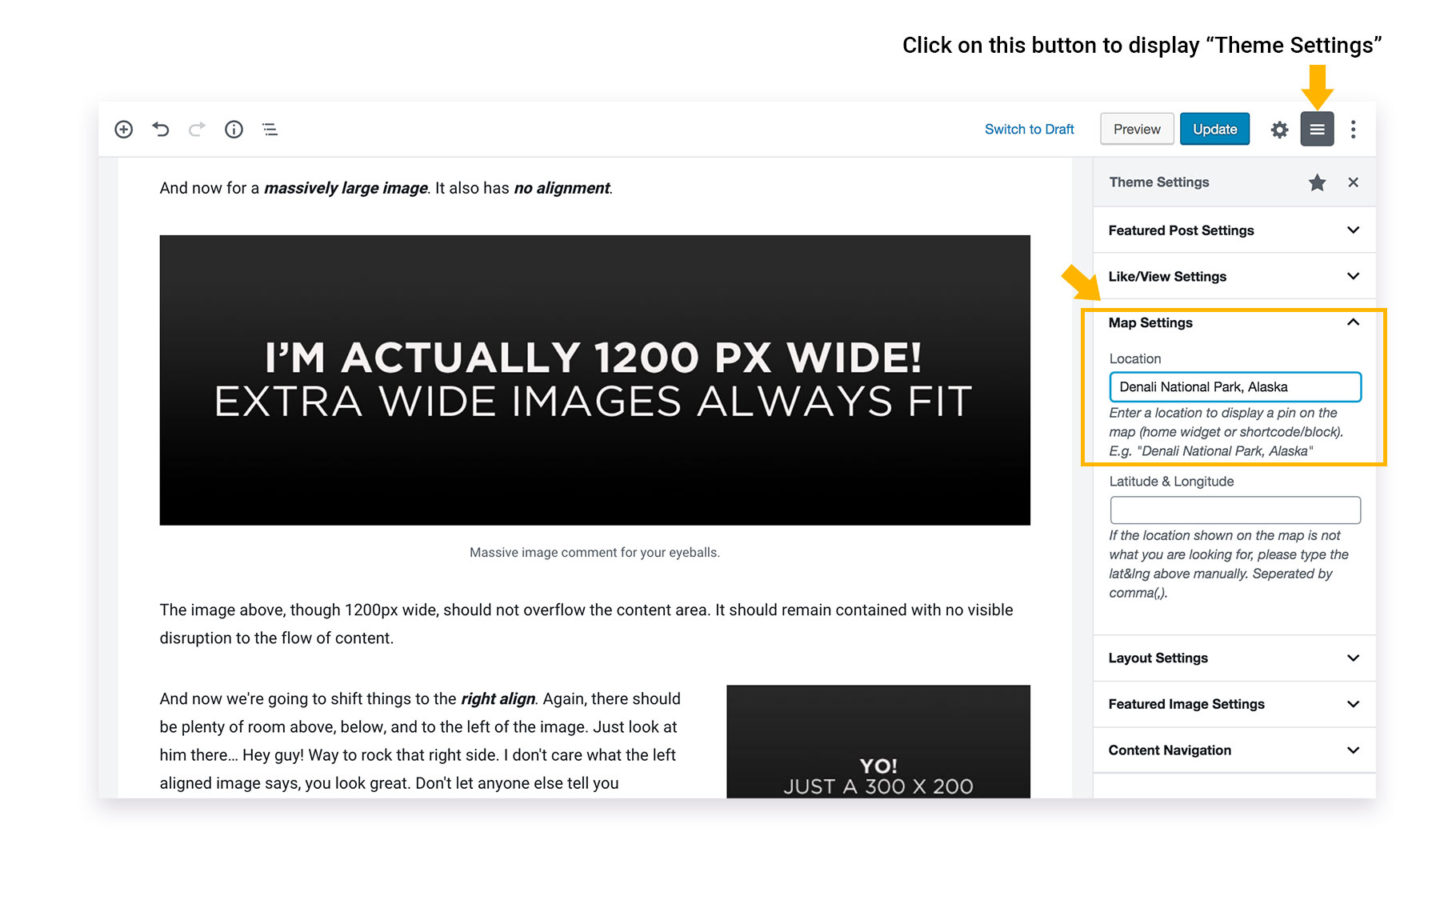
In Gutenberg Block Editor
If you use Gutenberg Block Editor, you can find the field for adding location in Theme Settings > Map Settings > Location field.
Then, when you add a Google Map to your homepage (using the home widgets “Google Map”), or add a Google Map to your post/page content (using Google Map shortcode or Gutenberg block), you will see a pin shown on the map. Click on this pin to display the thumbnail (featured image) and title of this post. Click it to go to this post.

Display a Google Map on homepage
Please open your WordPress customizer, go to Home Page > Content Area Before Latest Posts > Click on “Add a Widget” button, select Google Map. Then the map will display on your homepage.
There are some options:
- Width – Normal or Fullwidth
- Height – Enter a height for the map.
- Number of Displayed Pins – Enter a number to limit the maximum number of pins displayed on the map (because each displayed pin will cost a certain amount of Geocoding API credits). Enter “0” to display all pins.
- Preset Style – Select a preset style for your map. Currently there are 4. More styles will be added in future updates.
- Zoom Level – Enter a number to decide the map resolution. (0: World; 15: Streets; 20: Buildings. More info can be found here.)
- Centered Location (optional) – Add a location to ensure the center point of the map. It can be the name of a city/street/building.
Add a Google Map to page/post content
You can also add a map with all the destinations (posts with locations) in the content of single posts or pages.
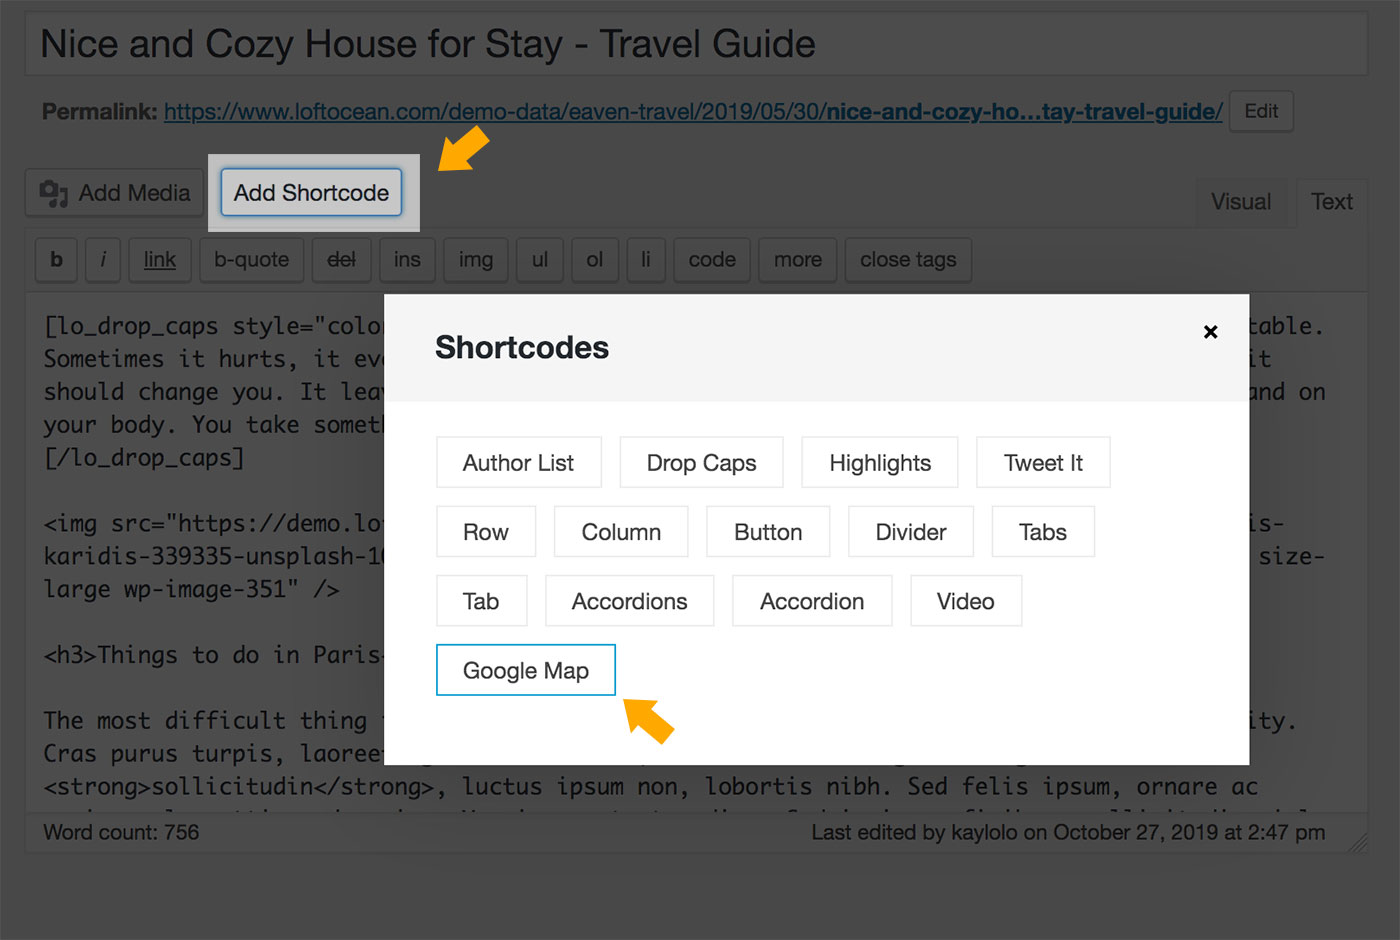
In Classic Editor
In classic editor, just click on “Add a Shortcode” button, then click “Google Map”.
In classic editor, just click on “Add Shortcode” button, then click “Google Map”.
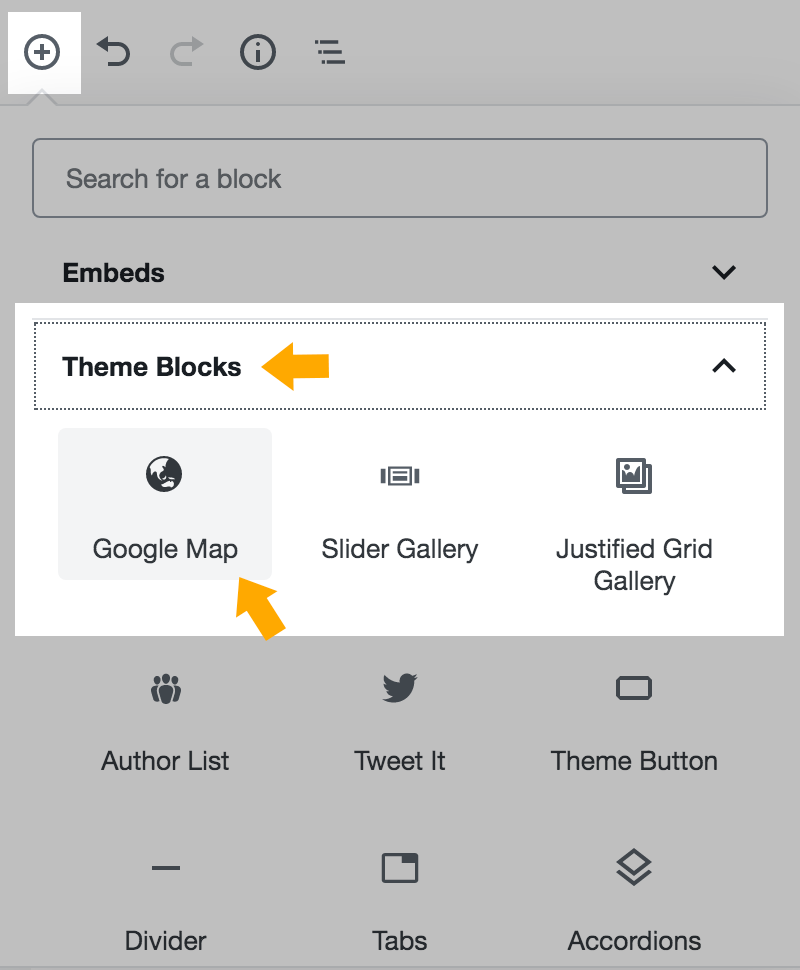
In Gutenberg Editor
In Gutenberg Block Editor, when adding a block, find “Theme Blocks” > “Google Map”, then add it to the page.
Please note:
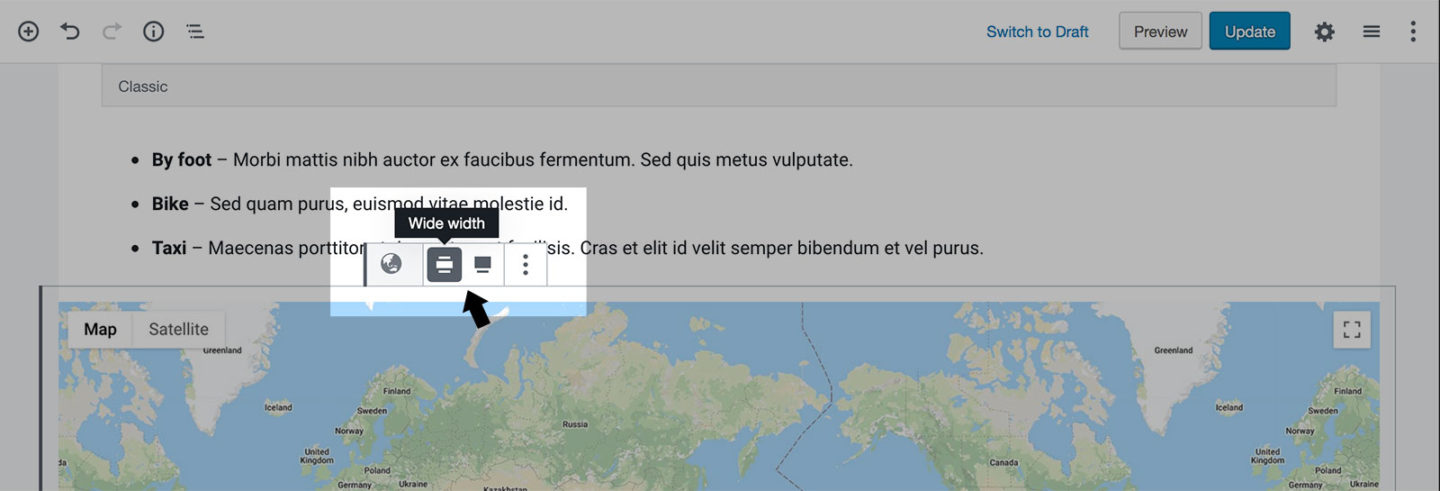
- To save your Google Map Geocoding API credits, it only shows a map placeholder image in Gutenberg editor. Please save your settings and check the results in the front-end.
- When eiditing in Gutenberg, to change the map width, please click on the map placeholder, then you can choose between “Wide Width” and “Full Width”. To maintain a normal width (same as text paragraphs), do not select either of these two.
How to display a map with a specific location, not posts?
You can simply embed a map. You don’t need to add a Google Map API key to embed a map. And it will not cost your Geocoding API credits.
Note: Traffic and other Maps info is sometimes not available in the embedded map.
- Open Google Maps.
- Go to the directions, map, or Street View image you’d like to embed.
- In the top left, click Menu.
- Click Share or embed map.
- Click Embed map.
- To the left of the text box, pick the size you want by clicking the Down arrow.
- Copy the text in the box. Paste it into your post/page content. If you are using Gutenberg, please add an HTML Block to add the embed code.
You can find the details in Google Map Documentation: Embed a map or directions.